 |
Return to John Muir Trail Gallery Index |
Click on the photo thumbnail to view a full size image
 |
 |
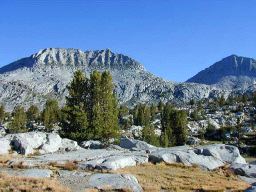
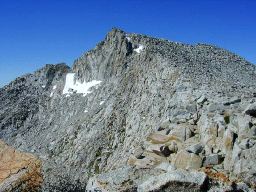
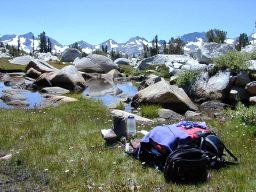
Starting up towards Donohue Peak from camp at Rush Creek - it's the slight point near the right end of the long rocky ridge. Only 3 miles away, and 1800 feet up! My route will go to the right around the rocky shoulder at the base, then left and up a saddle (not visible) between Donohue Peak and Peak 12,200 at the right edge of the photo. Then I'll be climbing a ridge on the back side of the mountain.
JMT0184.jpg
|
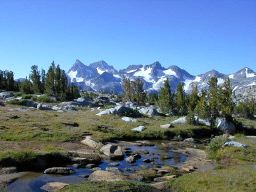
The first look back towards the Ritter Range, with Banner Peak (the pointy one on the left) Mt. Ritter (the flatter one beside it), and Mt. Davis (the one leaning to the right near the middle). I'm not too high up yet...
JMT0185.jpg
|
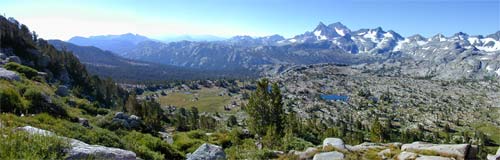 |
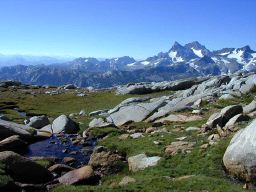
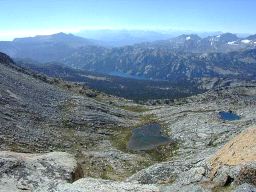
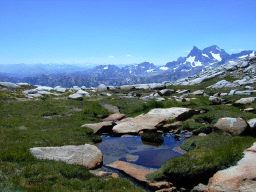
Now I've climbed about 800 feet up a steep grassy slope, and the view starts to change. Camp is one mile over the edge just beyond the pools, below the Ritter Range. (Panorama with 3 images)
JMT0186-188.jpg
|
 |
 |
The view straight back down the grassy chute I just climbed. Rodger's Peak (center) comes into view.
JMT0189.jpg
|
Looking back the way I came, from a plateau above the grassy chute. Now I've climbed 1000 feet above camp (to 11,200 feet).
JMT0190.jpg
|
 |
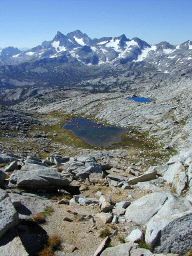 |
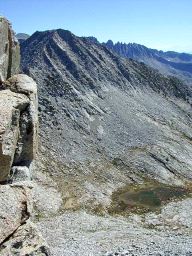
The plateau ends with a lake (Lake 11,200), and a rocky face leading to the saddle between Donohue Peak and Peak 12,200. The saddle is at 11,520 feet, and will take me onto a ridge leading to the summit (to the left, off the edge of the photo). Note the "wart" on the ridge near the left side - this will become a prominent landmark!
JMT0191.jpg
|
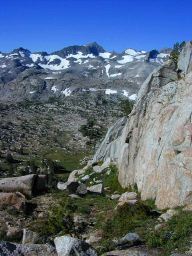
Starting up the rocky face to the saddle, looking back at Lake 11,200 on the plateau. Beyond it, the Ritter Range.
JMT0193.jpg
|
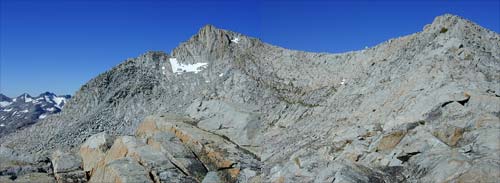 |
Once on top of the saddle, it's almost a straight line up the ridge to the summit. The ridge "wart" on the right presents the only interesting obstacle...! (Panorama with 2 images)
JMT0196-197.jpg
|
 |
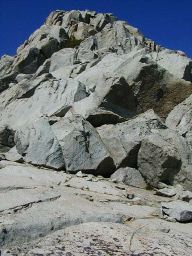 |
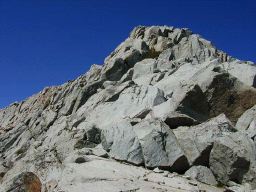
The "wart" is the only steep section on this ridge - the boulders are the size of a VW. The left face is a little too steep for a traverse...
JMT0221.jpg
|
Up and over is the only way past the "wart." What fun! My knapsack is the size of the small hemispherical rock in the front!
JMT0220.jpg
|
 |
 |
The "wart" is now behind me, and I'm looking at the rest of the ridge line on the back side of the summit. Piece of cake, except it's all medicine-ball-sized boulders!
JMT0198.jpg
|
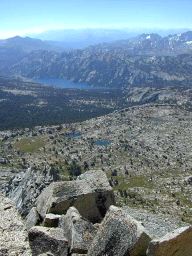
The view back down over Lake 11,200, with Waugh Lake coming into view (the big one straight beyond the dark green).
JMT0199.jpg
|
 |
 |
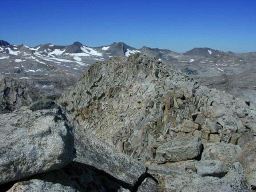
ON THE TOP! Yippeeee!!! The benchmark marks the summit, and the register book is in the fat white pipe section on the left. The total climb took 2-1/4 hours, with lots of stops for photos. The south end of the Cathedral Range is partly in view, with Rodger's Peak on the left, Mt. Lyell on the right.
JMT0200.jpg
|
The view from the edge of the summit back down towards the direction I came. Peak 12,200 is the prominent dark one above Lake 11,200. The ragged mountains are the south end of the Koip Crest, the backdrop behind camp at Rush Creek.
JMT0202.jpg
|
 |
 |
Looking straight down towards the pools, Waugh Lake is clearly visible. The rocky spine in the foreground forms the right end of the long flat ridge that was visible from camp.
JMT0203.jpg
|
Looking right towards the Cathedral Range, this rocky ridge is the rest of the ridge line that formed the long flat ridge as viewed from camp. Simons Peak is just to the left of the ridge (the double peak), and Amelia Earhart Peak is the flat one near the right.
JMT0204.jpg
|
 |
 |
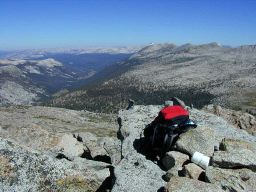
The backside faces Lyell Canyon, which we'll be hiking through in a couple of days. Mammoth Peak is the last tall peak down the Kuna Crest on the right. Potter Point is the last tall bare point on the ridge on the left.
JMT0205.jpg
|
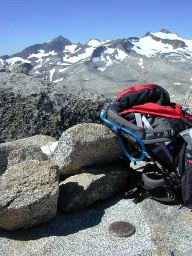
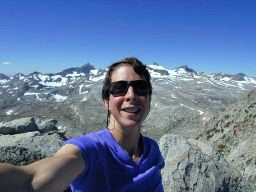
It's really me up here! Rodger's Peak is left of my head, Mt. Lyell is just to the right of my head, with Mt. Maclure just to the right of Lyell.
JMT0206.jpg
|
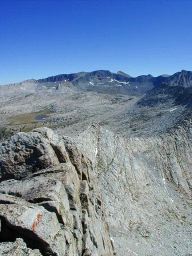 |
The view back down the ridge I came up. I gained the ridge at the saddle by climbing directly up the face on the right. Kuna Peak is the flat dark mountain in the center, and Koip Peak is the sharper one behind it and just to its right.
JMT0208.jpg
|
 |
A 300° panoramic view from the top! Kuna and Koip Peaks are at the left edge. Banner Peak and Mt. Ritter are nearly dead center. Camp is somewhere down there too! Part of Thousand Island Lake (above and to the right of Waugh Lake - the biggest one) and Gem Lake (beyond and left of Waugh Lake) are visible. Marie Lake and Davis Lakes are barely visible below Mt. Davis, the first sharp peak just to the right of Mt. Ritter. Rodger's Peak is the prominent dark peak to the right of center, Mt. Lyell is the one with the large glacier in front (Lyell Glacier) and the diagonal ridge. Mt. Maclure is just to its right, also with a glacier (Maclure Glacier). Simons Peak is the dark double peak just over the rocky ridge, and Amelia Earhart Peak is the flatter one towards the right. The panorama continues all the way past Potter Point, with Lyell Canyon at the right edge. (Panorama with 7 images)
JMT0209-215.jpg
|
 |
 |
The trip down was just as beautiful as the trip up. Now I'm back down past Lake 11,200, about to head down the grassy chute again.
JMT0222.jpg
|
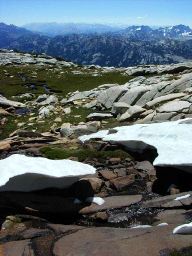
There was still some snow on the slopes, for variety.
JMT0223.jpg
|
 |
 |
Down at the pools of warm (relatively!) water, I'm so far ahead of schedule, I decide it's time for a swim! (I'm up and down the mountain in under 4 hours, but not due back for another 2 hours.)
JMT0224.jpg
|
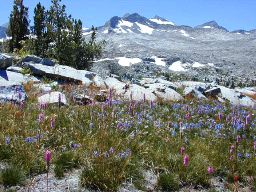
The wildflowers are so dense in places, I can't avoid stepping on them... ouch! Rodger's Peak, Mt. Lyell and Mt. Maclure from a lower angle... what a difference!
JMT0225.jpg
|
 |
 |
One last look back up the front side of my little mountain.
JMT0228.jpg
|
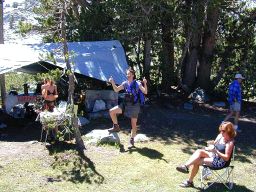
Back in camp, feeling great! Everyone else enjoys the day in the sun as well. (Photo by Vicki)
JMT0239.jpg
|
|
Return to John Muir Trail Gallery Index |